This website was created and is maintained by Don Bullock.
He can be reached at basithd@yahoo.com
All material on this website is copyright by Donald W. Bullock
All rights are reserved
I have to admit that I'm not one who makes a lot of jigs. Rather than spend time out of a project making them I've found it to be much more convenient to buy the jigs I need. I've still managed to make some projects for the shop. Most of my shop projects are related to storage and holding things. I've also made some tools for my shop.

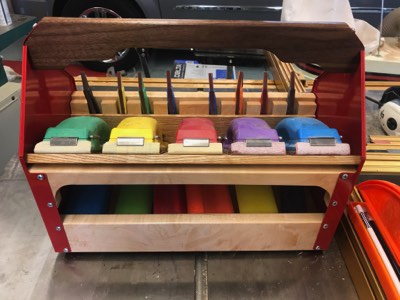
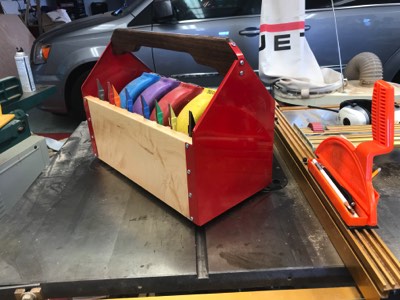
Sanding Block Tote
This is the tote I made for my sanding blocks. I've found it to be a very handy addition to my workshop. The metal ends are from Lee Valley Tools and all the wood I supplied. The major wood parts are figured maple, walnut and oak plywood. All the wood used were offcuts and scrap I had hanging around the shop. Go to my YouTube channel for a video on this project as well as one on the sanding blocks. YouTube Channel Link.

I've always needed an outfeed table since I bought my SawStop. This is a much needed project that will eventually provide storage as well as a place for long boards to go after they are cut on the table saw.
Outfeed Table

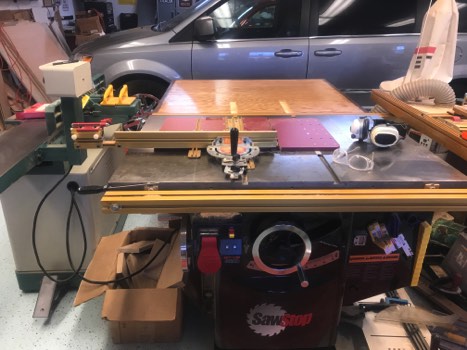
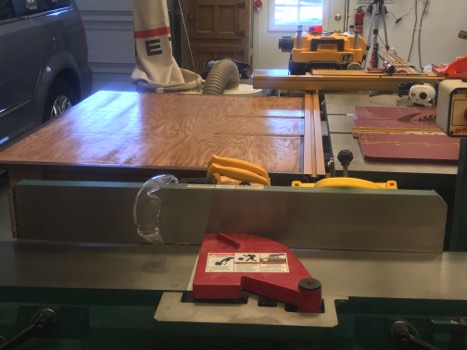
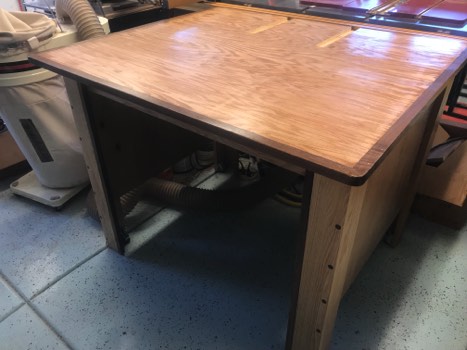
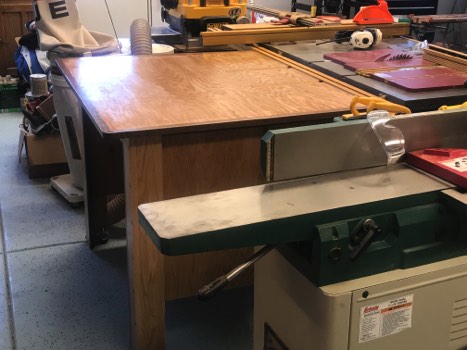
This outfeed table was based on a design by Marc Spagnuolo, the Wood Whisperer. Mark gives credit for some of the basic construction of his outfeed table to Norm Abram from the New Yankee Workshop. Marc's instructional video can be found on his website.
LINK- Wood Whisperer Outfeed Table
Marc also made another version of this outfeed table when he made a change in his shop. That table can also be seen on his website.
LINK- Wood Whisperer New Outfeed Table
I deviated from Marc's design quite a bit. Instead of using plywood for the legs I used some 4/4 red oak boards that I had sitting on my lumber rack. I've also made the sides solid plywood and left out the bottom shelf. Eventually I plan to have a mobile cart with drawers that rolls under my outfeed table. I need the extra storage. By putting the cabinet on castors I'll also have access to the back of the table saw where the dust collection pips is and the electrical plugs and cords that are behind the table saw. Obviously I still need to make or purchase the cabinet of drawers to go under the table. I just need some money and time neither of which have been a priority.

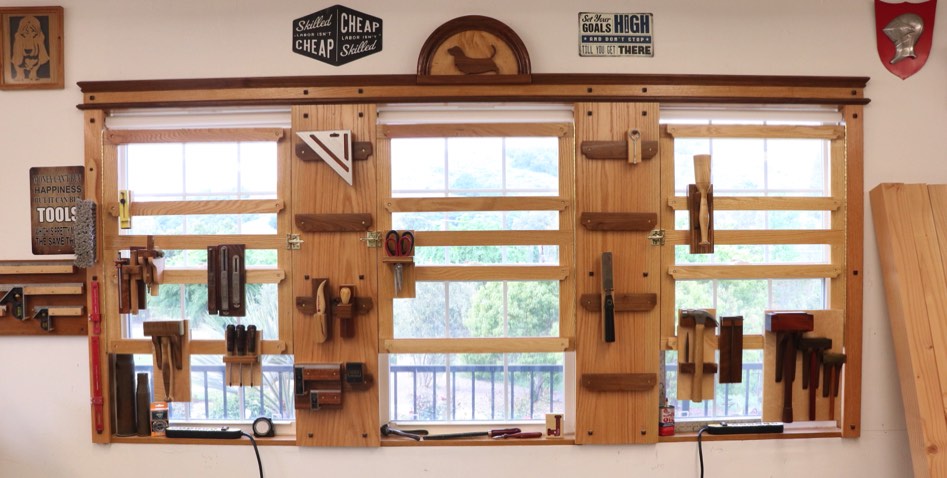
Tool Wall
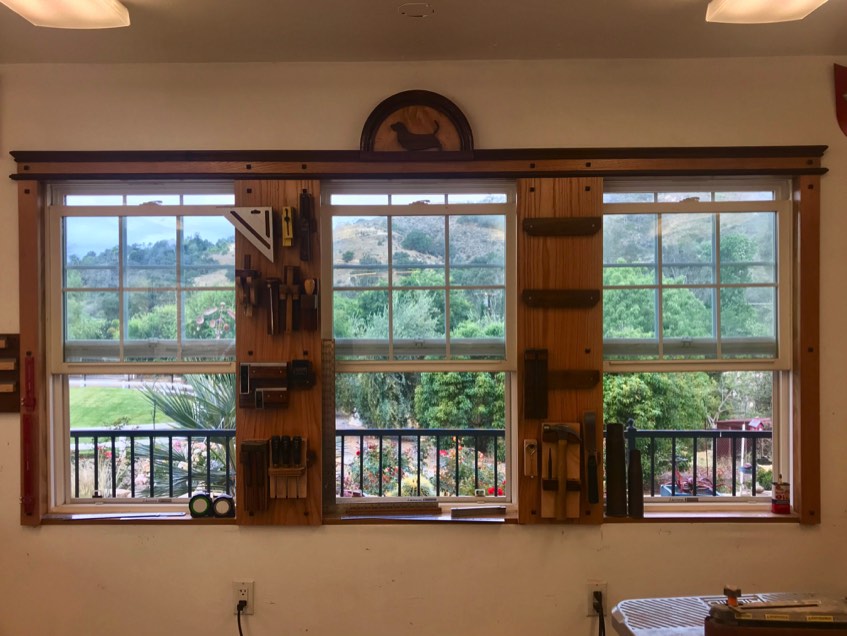
When I designed my workshop/garage building I wanted the workshop to be on the wall facing the wonderful view we have from our home. To take advantage of that view I designed a row of three windows on that end of the building. The windows had some empty space between them so I'm turning those spaces into a place to hang some of my frequently used tools.
One of the projects I continue to work on is some tool holders between the windows of the shop. These are tools that I have been using a lot or will in the future once my workbench is built. It will go just below these windows.
The tool holders are all made from hardwood scrap. I decide which tool is next and then look for the wood to make the holder. I documented making the holder for my tac hammer in a video. There are some others as well.
I'm still not even close to adding all my tools. In addition to these French cleats I have made some tool holders that go over the windows (see below).
I've already found this tool wall be be a great asset to my shop. My tools have a place and I'm very careful to make sure that they go back where they belong.
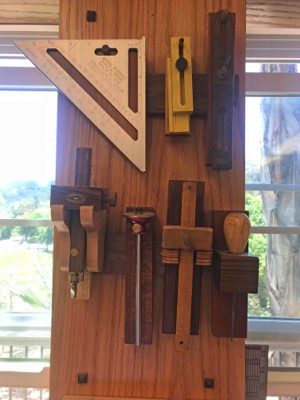
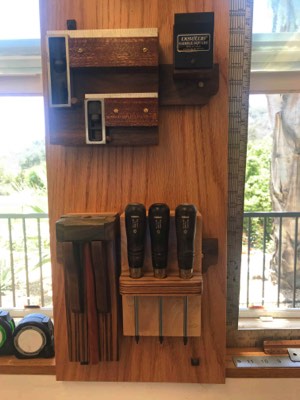
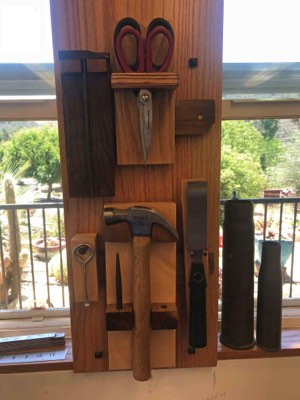
Starting with the upper left section (top photo) I have my marking gauges, awl, bevel guide, framer's triangle and a handy measuring rule that I'll make a video on sometime. Then below those (middle photo) I have some squares, my Veritas saddle square that I've made a video on, my Kings Fine Woodworking mini Thor's hammer and a set of Narex square drive screwdrivers. The other photo (bottom photo) shows my tac hammer, two different types of scissors which I plan to show in a future video, my Verutas flush cut saw, a hammer with nail set and one of those tools that's designed to open paint cans. I still have a little space in one French cleat in this photo and two more above it. I'll make tools for those spots when I get a chance.
Below on this page I have the Hinged Tool Racks that I built for the adjoining windows. As I have the need and get the chance in my working schedule I'll be making tool holders for all of these French cleats. I'm finding this "tool wall" to be extremely useful and it's not even close to being filled up. Having a convenient place for my tools where I know where they are and can easily get them and put them back is outstanding. I'm really enjoying this tool storage.
NOTE: In my area I do NOT has any issues with rust on tools. This may not be the case for everyone.
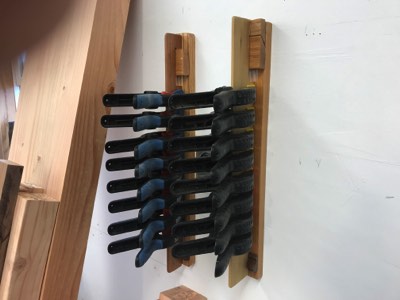
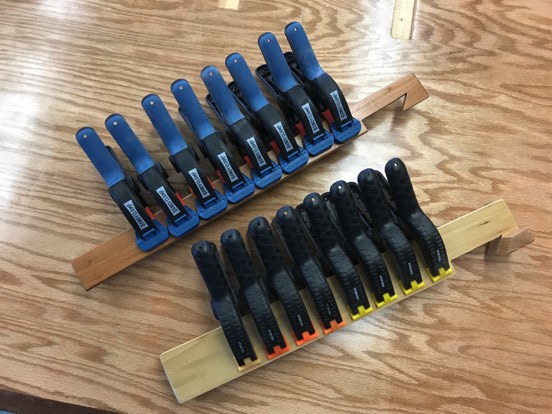
Spring Clamp Rack
Here are a couple of racks for my large spring clamps and Rockler Bandy Clamps. The center piece rests on a French cleat and the clamps attach to it. When I need to use the clamps I can take all of them to the job at one time (bottom photo).
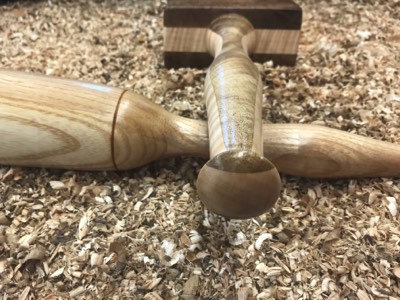
Wood Carver's Mallets
Check my Shop Project Videos Page
for videos on some of these tool holders.
Dead Blow Mallets
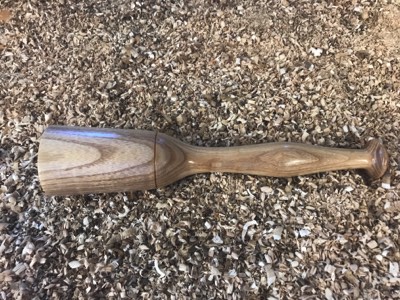
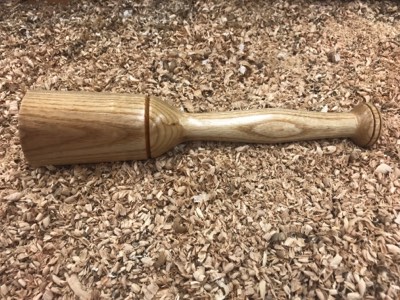
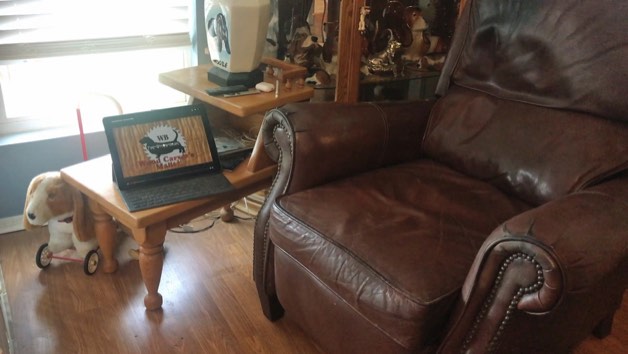
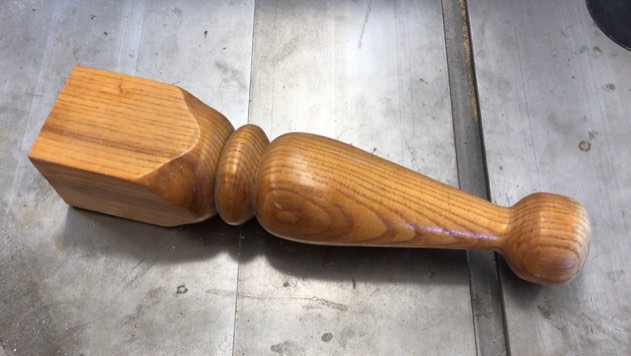
I've mentioned elsewhere on this website that back in 1971 I made a set of coffee table and end tables for our first apartment. They were made in a style that was popular back then, Early American. The coffee table was given away, one end table is still in use (picture below) and the other end table was disassembled.
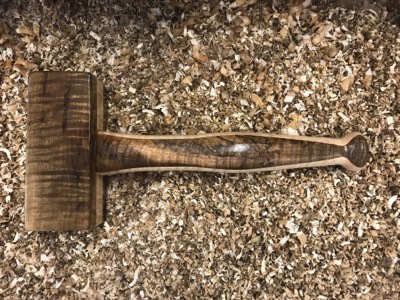
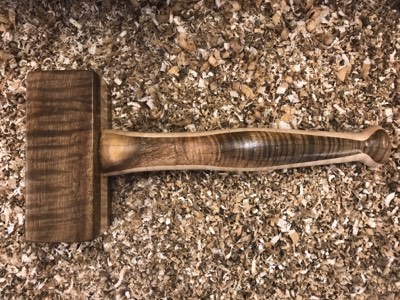
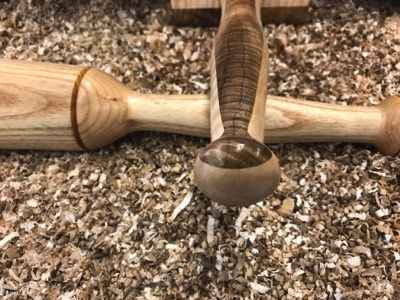
I took two of the legs including this one and turned them into wood carver's mallets.
Here are photos of the two malets that I turned.
Video links to the videos for turning these mallets.
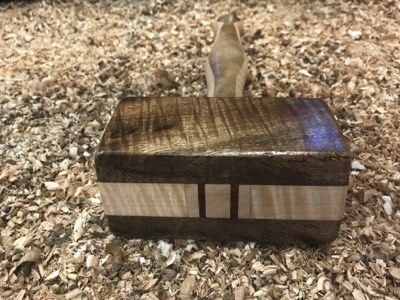
When a friend on YouTube, James King, decided to have a challenge on making a mallet I jumped in. I decided that I had wanted to make a dead blow mallet so that's what I did. It's now official. I won the James King Fine Woodworking Mallet Challenge for 2018 with my dead blow mallet. Special thanks for James and his family for sponsoring this contest.
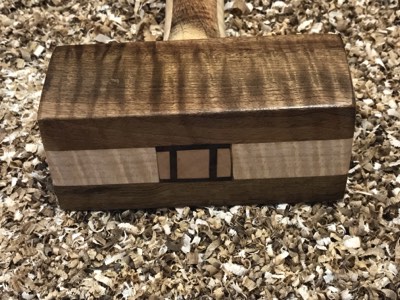
Photos of my first attempt at making a dead blow mallet. The wood is curly maple and curly myrtlewood.
I had some difficulties with making the mallet and while the results were beautiful and functional I had to prove to myself that I could do it right. As a result I made a secone, similar mallet, and documented the build along with pointing out the mistakes I made on the first one.
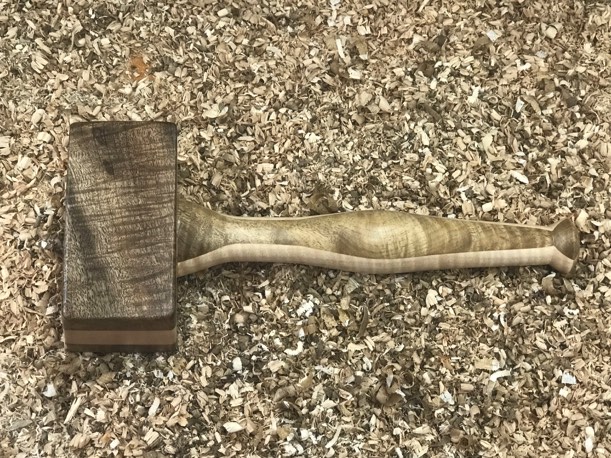
Photos of the second dead blow mallet using the same wood choices.
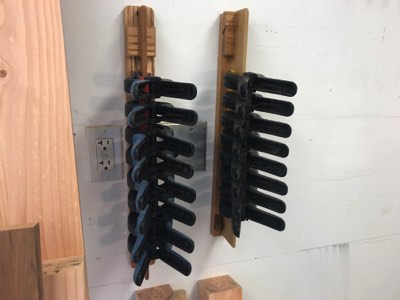
Hinged Tool Rack for Workshop Windows
Traditionally many woodworkers through the ages have placed their workbenches under windows. Since I Since I have a great view from the windows in my shop I wanted to preserve that as much as possible but still use the area for storage of the tools I use regularly at my workbench. When I told my wife what I was making she immediately asked how I planned to open the windows if I placed the tool racks on them. To respond to her question I decided to place the racks on hinges. The resulting French cleat tool racks have already become extremely handy and I haven't had time to make all the tool holders that I need.
This project is best viewed in the videos I published on YouTube when I made it. You can go to my video section for links to the videos. There is a series of four on my Shop Projects videos page.
Bird Cage Awl
My friend, Rob, over at Make Things presented a challenge for woodworkers to make a stubby awl for their shops.
There are subsequent videos on awls Rob has made on his YouTube channel too.
I accepted Rob's challenge and have made the following awl made from maple and walnut. It's finished with lacquer.
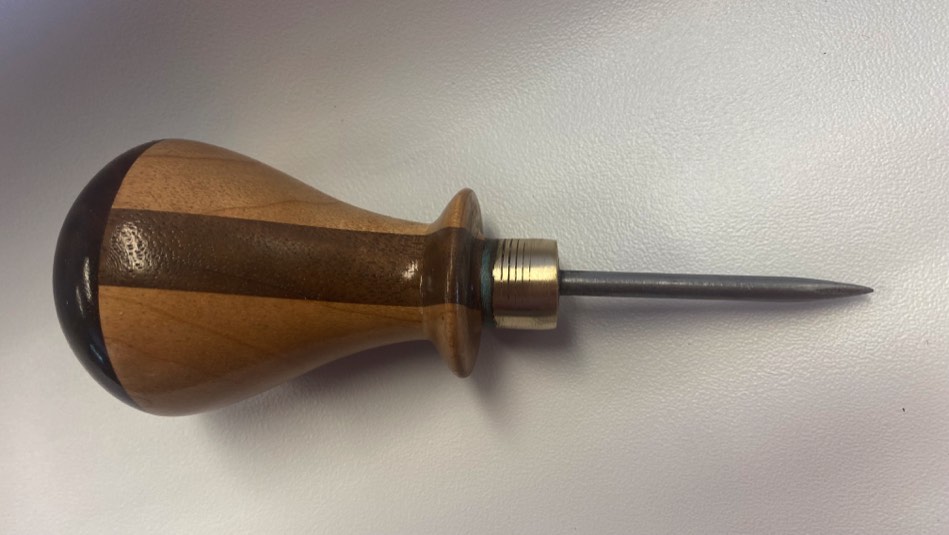
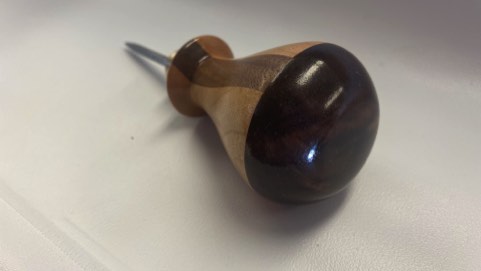
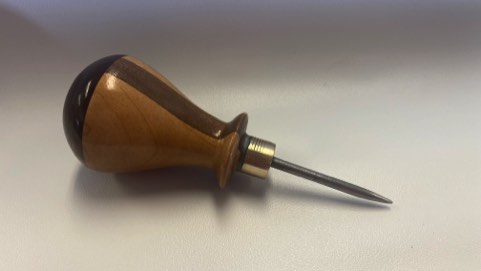
The awl I made is called a birdcage awl. There is a series of YouTube Shorts on this project on my YouTube channel. They can be viewed on my WB Fine Woodworking YouTube channel. A full video on this project will be published after I finish posting the series of YouTube Shorts.
The First Video
in a series of
YouTube Shorts
The Awl Challenge