Tables
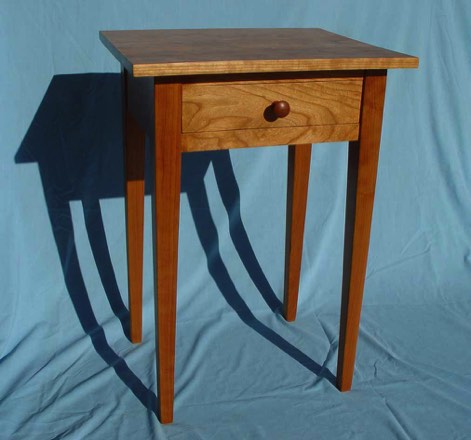
The table pictured here was completed before we moved to our current home and workshop. When I decided to start doing some woodworking projects again I realized that I needed to get some help. I took a class for intermediate woodworkers offered by the Woodcraft store on Orange County, California. The goal in the class was to produce a Shaker side table. As can be seen from the pictures above I succeeded in my assignment. In fact the instructor wanted to swap the table top on my project for one he made for his home. He loved my choice of grain pattern and how I matched the three boards to make up the top. It was a fun project and rekindled my desire and passion for working with wood. I also learned a lot of techniques, used several tools that I had never used before and brushed up on my skills. The legs and rails are connected with mortise and tenon joinery. This was my first attempt at using them. In the past I'd always used dowels.
I plan to add some more pictures of this table.
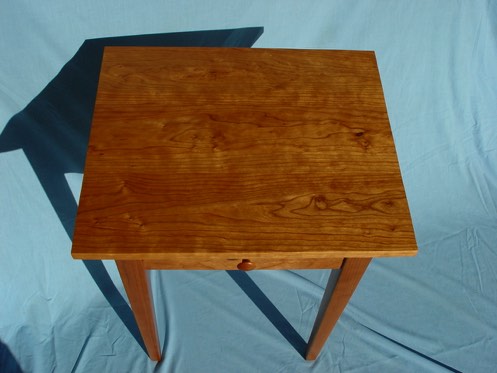
Shaker Side Table
Made From Cherry
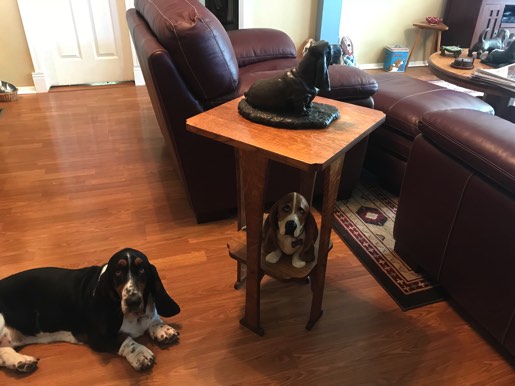
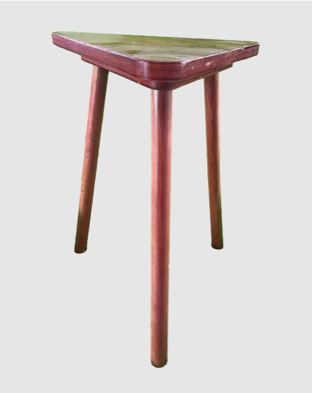
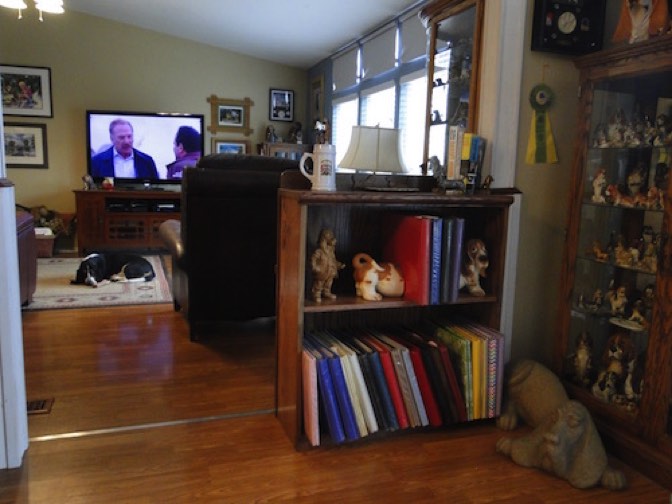
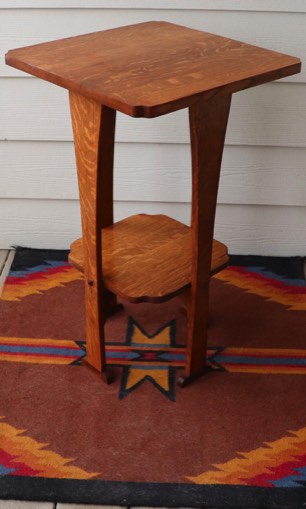
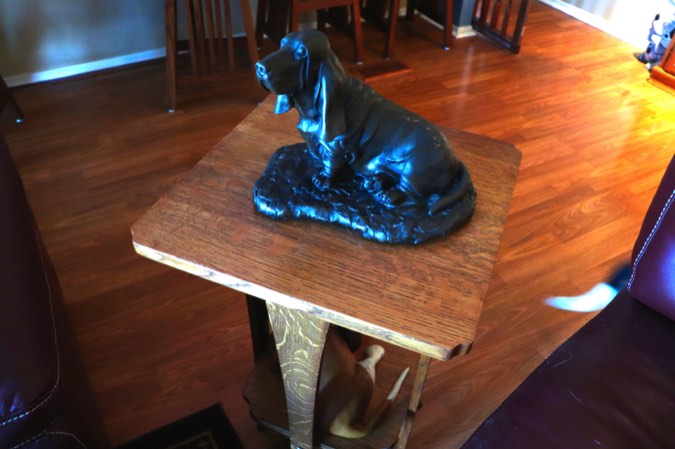
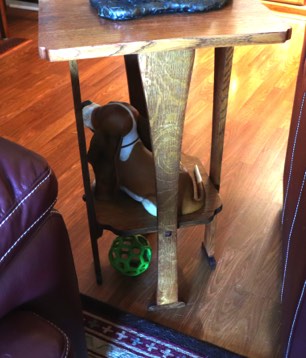
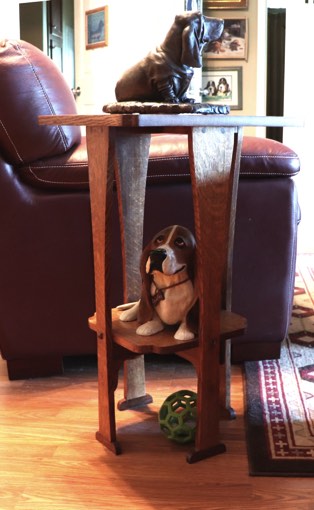
Craftsman Tabouret Table
Made From Quarter Sawn White Oak with Black Walnut Accents
After living In this home and having my workshop almost six years I was finally able to complete my first piece of furniture for the house. The table is called a tabouret. It’s my own design but is similar to tabouret tables made during the late 18th and early 19th centuries by people like Stickley and Limbert. They were designers and craftsman during the Craftsman or Arts and Crafts period of design. It is sometimes also referred to as Mission style.
I used mostly quarter sawn white oak which shows a lot of fleck, the figuring in the wood. It was stained in a similar color to what was used during the period. The feet, cross pieces and exposed dowels holding the table together are American black walnut which adds an extra flair and contrast to the piece.
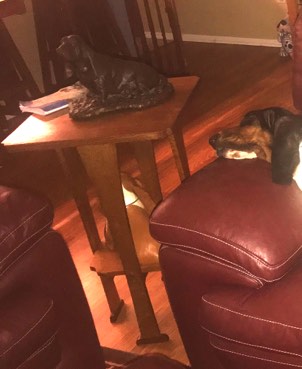
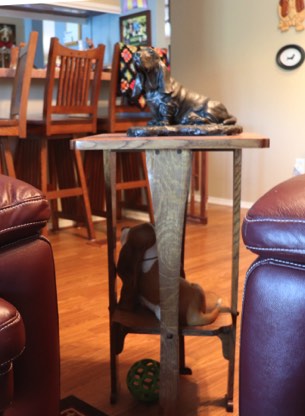
As you can see we’re displaying a couple of our larger basset hound figurines on the table. The table sits between our leather couch and chair in our family room. Since it looks great there this may be where the table ends up. Pam likes it there.
This website was created and is maintained by Don Bullock.
He can be reached at basithd@yahoo.com
All material on this website is copyright by Donald W. Bullock
All rights are reserved
My favorite types of woodworking projects includes furniture. Even though Pam nad I have been married 50 years there are pieces of furniture that we have never upgraded from what we had when we were married. Our style preferences have evolved over the years so there are some pieces in our home that I'd like to replace. There are some new pieces that we need in the house as well.


My First Piece of Furniture
Three Leg Stool
Made From Birch
As a seventh grader in junior high school boys were expected to take shop classes. My very first shop class was woodshop. This is the three leged stool that I made during the half semester (10 week) course. It's made from birch plywood and dowels.
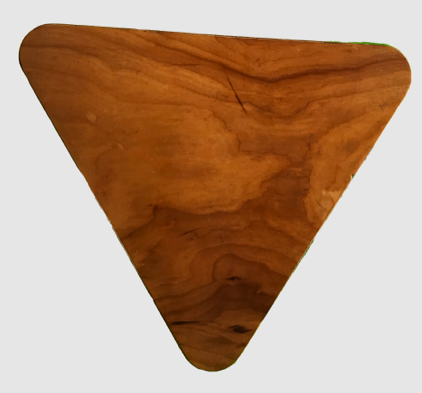
Everyone in the class made these stools. The instructor had a bunch of square birch plywood blanks for us to pick from. Unlike most of the students in the class I searched through the stack for just the right piece for the top. Even back then grain pattern made a big difference to me. The photo of the top of the stool below shows what I selected.
Over the years this stool has received some wear and tear. For many of those years the style didn't fit into our arts and crafts decor so it wasn't even on dispaly in our home. lt now has a special place in our family room where we actually use it as a small table but it's still sturdy enough to sit on if needed for that.
Shelves
Book Shelves
Made from Mahogany
When I was in high school I had a large collection of books. To store my books I made this bookshelf. For some unknown reason I decided that mahogany would make good shelves. This is true mahogany, not the stuff they sell today.
I designed these shelves in two parts. They come apart in the middle. My dad helped me make some metal pins to hold them together when stacked like this.
This shelf is now sitting in my mother-in-law's "den" in our home. She's using it for some of her knick knacks, photos and some photo albums. I didn't have a spot for it in the area I'm currently using for my office.
I'll have to take a photo of the other somewhat matching shelf that is in my office space. I made the second set of shelves about a year after making the first one. Due to the bright sun coming through the windows it's hard to photograph that bookshelf.
I plan to add some better pictures of this set of shelves and the other one that I made after I figure out how to light them better.
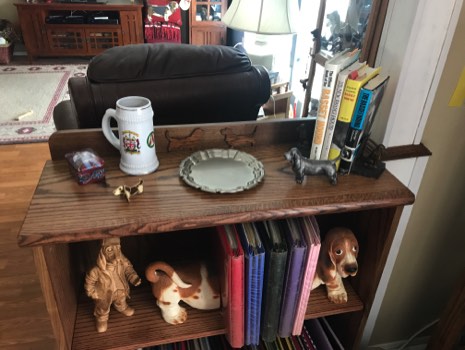
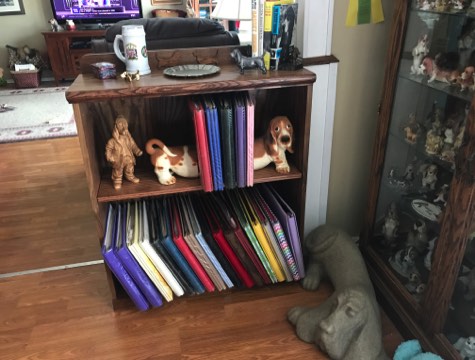
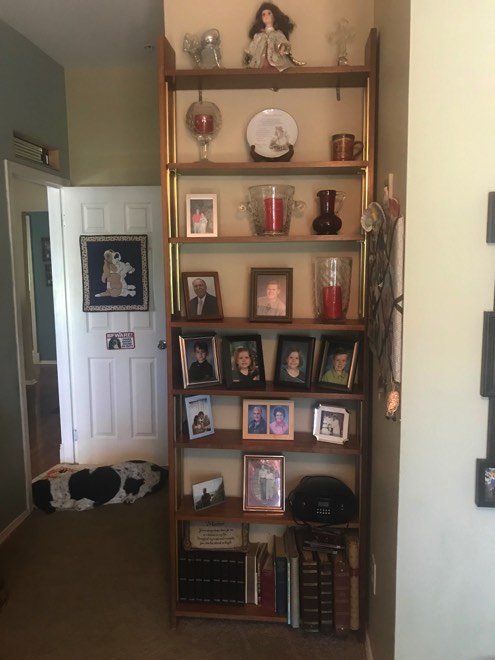
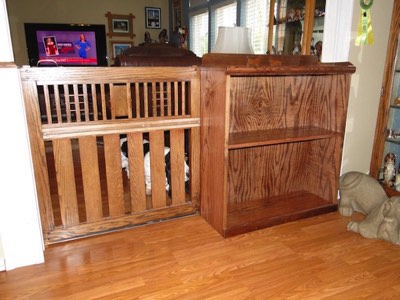
This is a bookshelf that I built in as part of a room divider between our kitchen and family room. The shelf along with an attached gate allows us to close off the opening when it's necessary to keep our dogs on one side or the other.
The bookshelf has now become the place for our albums of our AKC Champions and some of our collection of basset hound items. Nadia is checking out the new addition from a safe distance.
For more photos and information go to the Home Improvement page. Eventually I'll make a video on this shelf and gate.
Book Shelves & Baby/Dog Gate
Made from Oak with Walnut Accents
Hall Tree
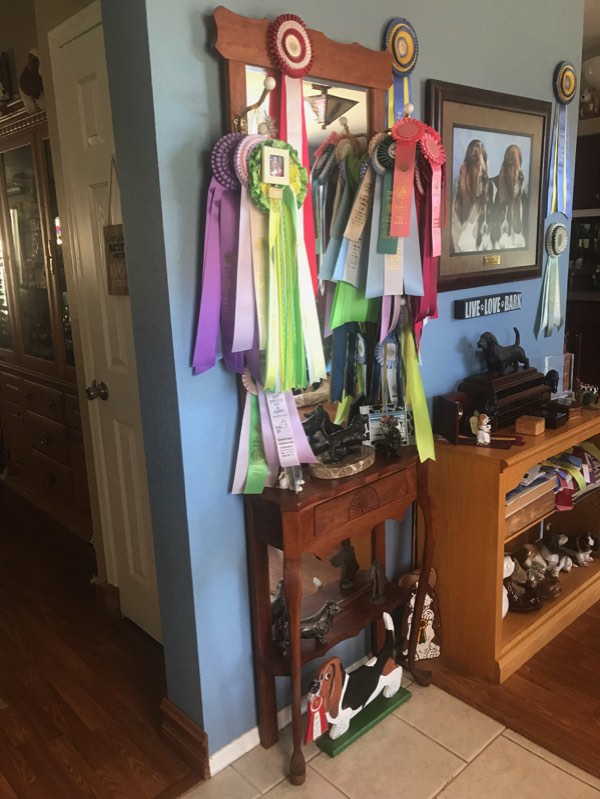
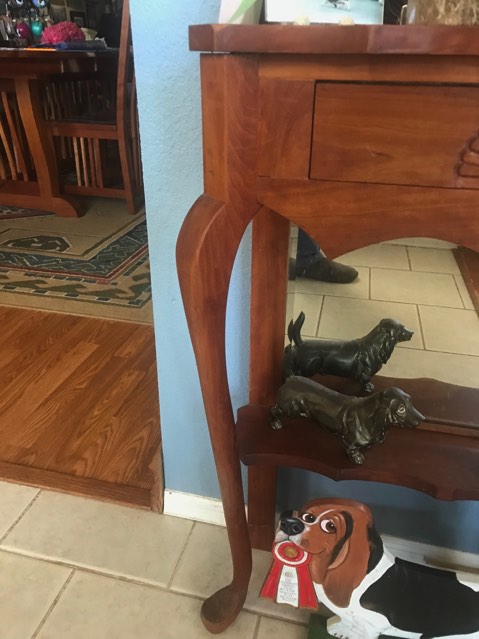
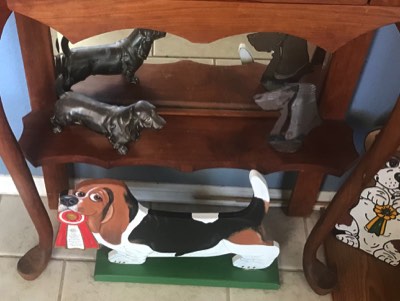
Everyone who enters our home is greeted in front of this hall tree. It stands to the right, opposite the front door in our entry. As can be clearly seen it's become a place to display some of our many ribbons from special wins at the dog shows. In fact it's become way too cluttered with ribbons. This piece was my original design. No plans or work by someone else were involved except for inspiration.
I made this hall tree in about 1979 fairly soon after we moved into our first home. It was sometime after I inherited the bandsaw from Pam's Great Uncle Dan and bought my Craftsman table saw. In those days Pam let me have the whole garage for my shop.
Looking back on making this piece today I'm not sure how I made it. I had never used a bandsaw on anything much less trying to create matching Cabriole Legs. I used an article in Fine Woodworking as a guide for cutting the profile of the legs on the bandsaw but the actual design was totally mine. I specifically remember deciding on spoon feet because I had no clue on how to carve claw and ball feet. The rough bandsaw marks were all smoothed out with what is referred to as a four in one half round rasp that I bought at Sears, a few files that my dad had and sandpaper. I had no idea that there were any other tools like spoke shaves or spindle sanders that would have made the job much easier. I'm very surprised at how well I cut the detail on the front of the shelf, front rail and top on the bandsaw to echo each other. They were finished off using the same tools that I used for the legs. I didn't make any patterns and didn't own a router so I couldn't have routed them using a pattern bit like many people would do today. While I had done some relief carving I knew nothing about how to carve a fan shape in a drawer front. I just looked at some examples in magazine articles, laid it out with a pencil and used some inexpensive chisels I bought at a woodworking store we found on Sepulveda Boulevard down near the Los Angeles Airport. In those days stores like Rockler and Woodcraft were unknown to me. I even remember buying the wood, cherry, there as well. I have no idea what the name of the store was and am sure it's no longer there. All the joints were doweled using a Sears doweling jig and dowel points. The jig was nothing like those that are available today. An article on doweling by James Krenov in the Summer 1977 issue of Fine Woodworking showed me how I could put pieces of wood together. Yes, the same Krenov who's famous for the his cabinets and started the School of the Redwoods.
Hall Tree
Made from Cherry
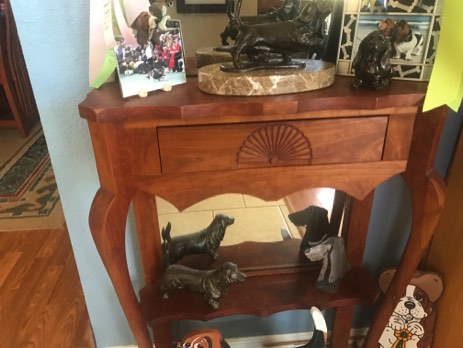
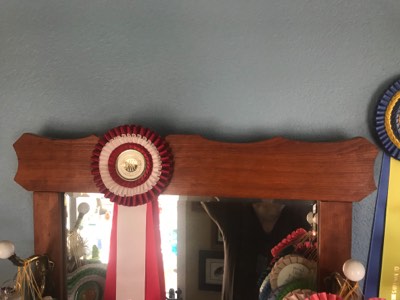
Detail of the top is echoed in the front rail and the front of the shelf.
Carved fan shape on the drawer front.
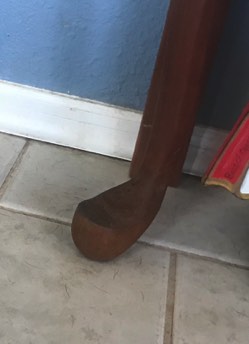
Cabriole legs finished off with spoon feet.
Sometime I need to take some better photos without all the ribbons.
A photo of the gate that slides behind the bookshelf. This set up has proven to be very useful and the gate slides well. When I make the video I'll cover the sliding mechanism and wheels and show how it works. A video of this project will be added soon.
Sometime in the future I'll have a more professional set up for photos. When I do I'll have some much better shots of my work. Unfortunately most of the items I made in the past were never photographed and some are no longer around due to our evolving taste in home furnishings.